Loading...
Integrating the WhatsApp Widget
The WhatsApp Widget adds a WhatsApp chat button to your website. When a visitor clicks it, they start a WhatsApp conversation with your connected number, where your TailorTalk agent replies. Follow these steps to add it to your website and customize its appearance and behavior.
Before you start, connect your WhatsApp number to TailorTalk. See WhatsApp.
Step 1: Open the Widget Generator
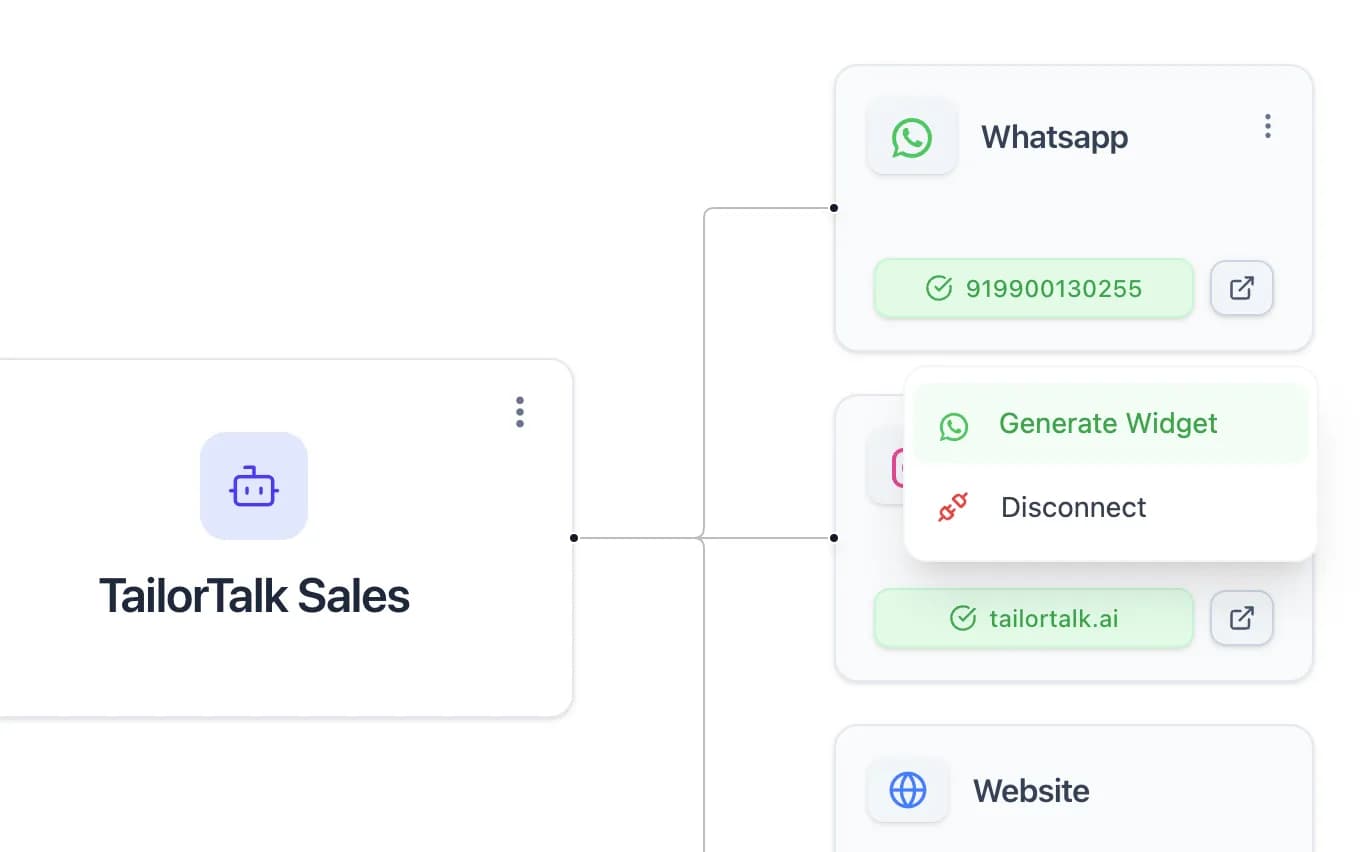
- Go to the Agent Page in your TailorTalk dashboard.
- Click the top-right menu on the
WhatsAppchannel. - Select
Generate widget.
Step 2: Customize and Test
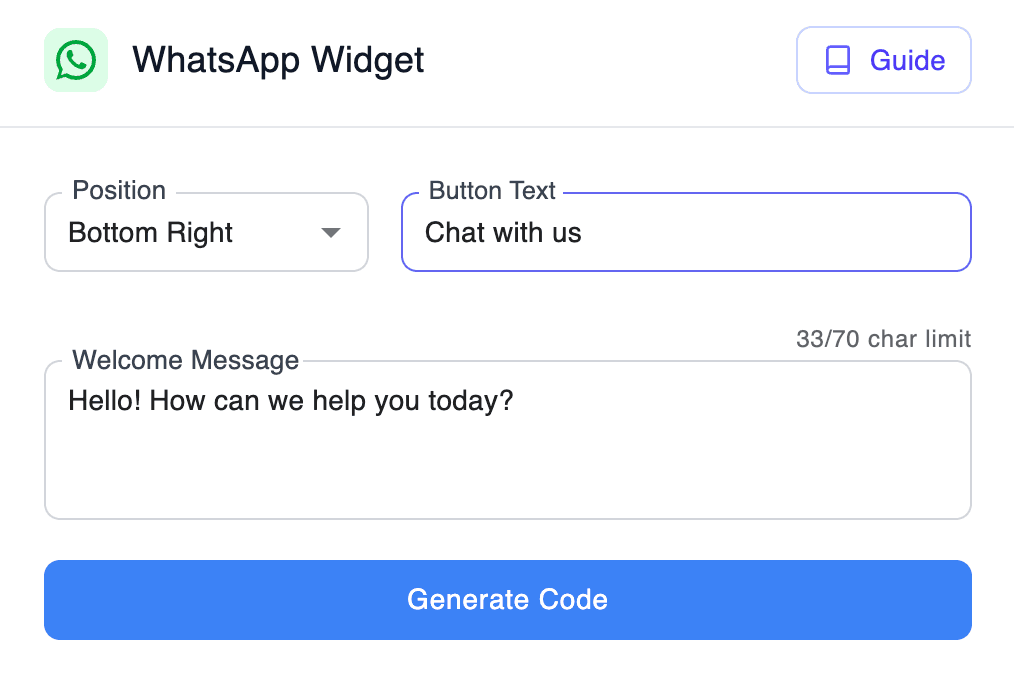
Enter your preferred settings and test the widget in the preview.
Widget Parameters
Top-level Parameters
| Parameter | Type | Default | Description | Required |
|---|---|---|---|---|
| agentId | string | (your agent id) | Your unique Agent ID. | Yes |
| position | string | 'right' | Horizontal position of the widget ('left' or 'right'). | No |
| whatsappConfig | object | WhatsApp settings (see below). | Yes | |
| conversionTracking | boolean | true | Sends widget clicks and messages to your Google and Meta tags. Set to false to turn off. See Conversion Tracking. | No |
| googleAdsConversion | string | (none) | Google Ads conversion ID and label (e.g. AW-123456789/AbCdEf) to fire when a visitor starts a WhatsApp chat. | No |
WhatsApp Parameters (passed inside the whatsappConfig object)
| Parameter | Type | Default | Description | Required |
|---|---|---|---|---|
| businessInfo.phoneNumber | string | (your connected number) | The WhatsApp number visitors will chat with. | Yes |
| buttonText | string | 'Chat' | Text displayed on the widget button. | No |
| welcomeMessage | string | (default message) | Welcome message shown when the widget opens. | No |
| popupMessage | string | (empty) | Short teaser message shown in a bubble before the widget opens. | No |
Step 3: Save & Generate Code
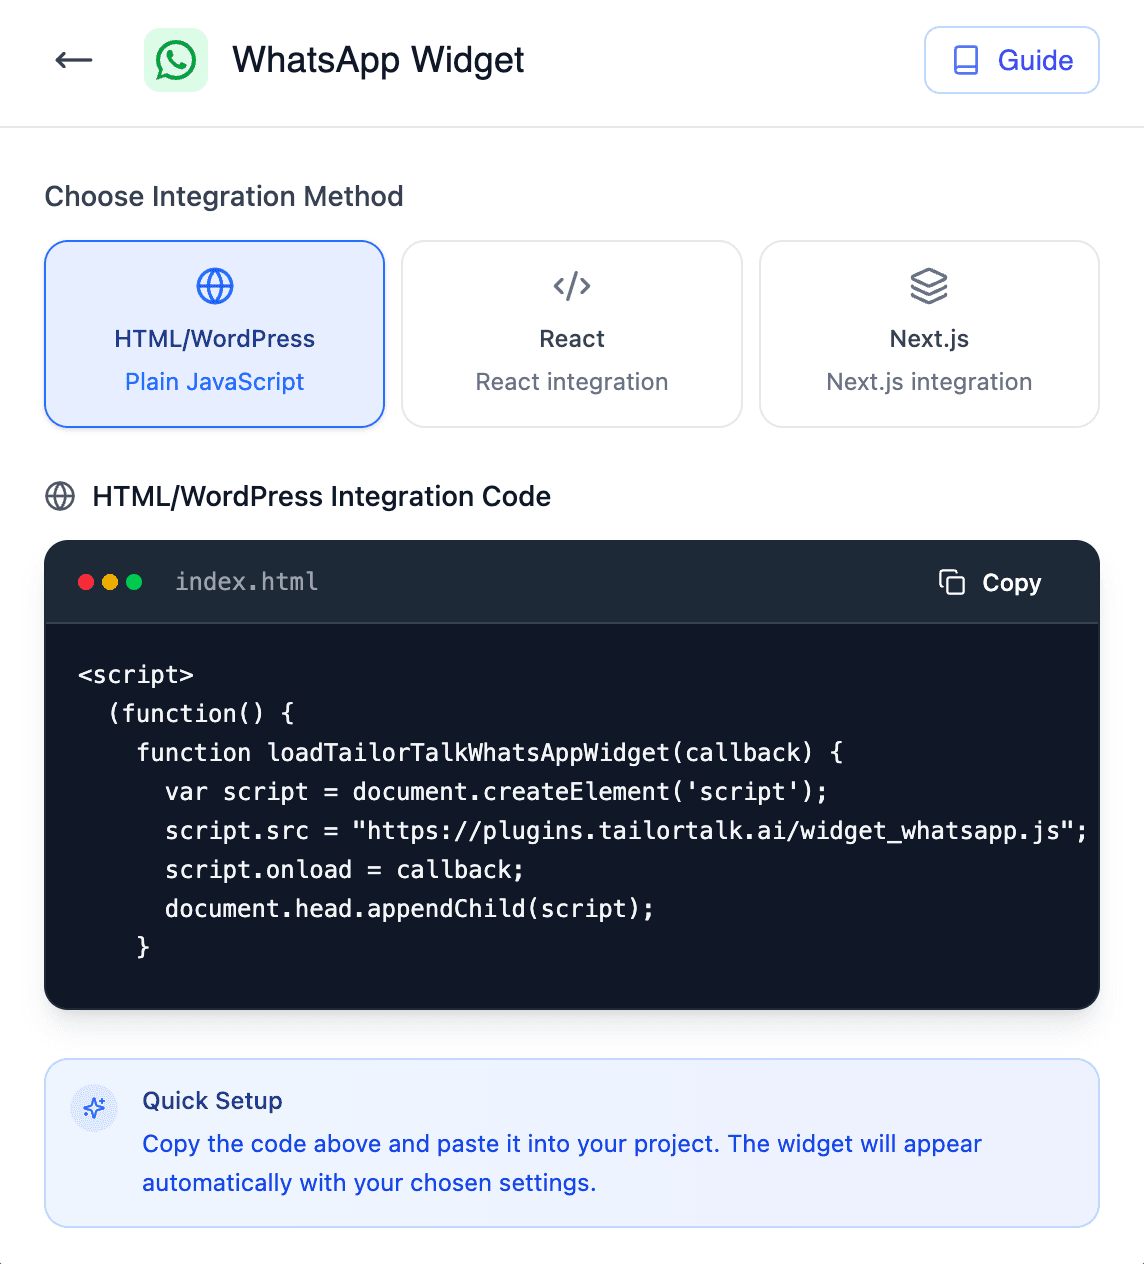
- Click Generate Code.
- Choose your Integration method (e.g., HTML, React, etc.).
- Copy the generated code snippet.
Step 4: Add the Widget Code to Your Website
Choose your integration method and add the code as follows:
HTML Website:
Paste the code just before the closing</body>tag in your main HTML file (e.g.,index.html).React Application:
Place the code inside auseLayoutEffect(oruseEffect) in your main component (e.g.,App.js).
You can also create a dedicated component for the widget.Next.js Application:
Use the code in your main layout or page file.
Make sure to importnext/scriptasScript.
Example Integration Code
Replace the values as needed for your configuration.
<script>
  (function() {
    function loadTailorTalkWhatsAppWidget(callback) {
      var script = document.createElement('script');
      script.src = "https://plugins.tailortalk.ai/widget_whatsapp.js";
      script.onload = callback;
      document.head.appendChild(script);
    }

    loadTailorTalkWhatsAppWidget(function() {
      window.TailorTalkWhatsApp && window.TailorTalkWhatsApp.init({
        agentId: "YOUR_AGENT_ID",
        whatsappConfig: {
          businessInfo: {
            phoneNumber: "YOUR_WHATSAPP_NUMBER"
          },
          buttonText: "Chat with us",
          welcomeMessage: "Hi! How can we help you today?",
          popupMessage: "Need help? Chat with us on WhatsApp" // Optional
        },
        position: "right"
      });
    });
  })();
</script>
Track Clicks and Messages as Conversions
The widget automatically sends its clicks and messages to the Google tag, Google Tag Manager and Meta Pixel on your website. To use them as conversions in Google Ads and Meta campaigns, see Conversion Tracking.

